? Here's how you can build them yourself!") After we decided on the best material, we decided we needed to figure out how to build our raised garden boxes.
After we decided on the best material, we decided we needed to figure out how to build our raised garden boxes.
? Here's how you can build them yourself!") After we decided on
After we decided on Some of the reasons why we decided to move to raised garden boxes were to help combat the horrible bermuda grass here in Arizona, and also to create a no till system for our vegetable garden. The rich soil that we filled our raised garden boxes with should provide us with a very light version of this Arizona clay soil we have. Less compaction = increased drainage, which my plants so desperately need!
“Take that you Arizona soil, you!”
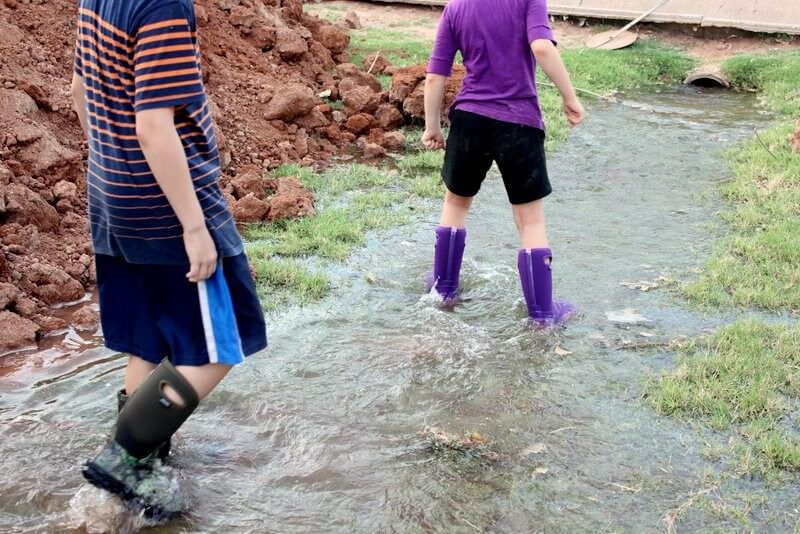
Before I begin, let me give a shout out to our awesome sponsor, Bogs. Living on a farm, you can image the kind of muck we’re exposed to every day. In Arizona, we water our yard every two weeks with a method called flood irrigation. Flood irrigation = mud. Lots of mud. Bogs to the rescue! They have an amazing variety of colors and sizes for everything from hard farming work to light gardening. Check ’em out!


? Here's how you can build them yourself!")
How to Build Raised Garden Boxes: the quick and easy method.
Today I’m going to get super technical and use words like “screw this board to that board” and stuff like that. Yes, my engineering skills are shining through. You’ve been warned.
? Here's how you can build them yourself!")
How to Build Raised Garden Boxes
Step 1 – Determine the size (length, width, & height) you want your raised garden boxes to be.
This really is all preference. As I planned out our raised garden boxes, I decided I’d better go big or go home, so I went with 2 – 16×3 foot garden boxes, along with 1 – 10×3 garden box. I also made them double high, at about 16 inches.You can use 12 inch wide boards and just make them 12 inches high, or you can do it like we did and use 8 inch wide boards and make them double high.
? Here's how you can build them yourself!")
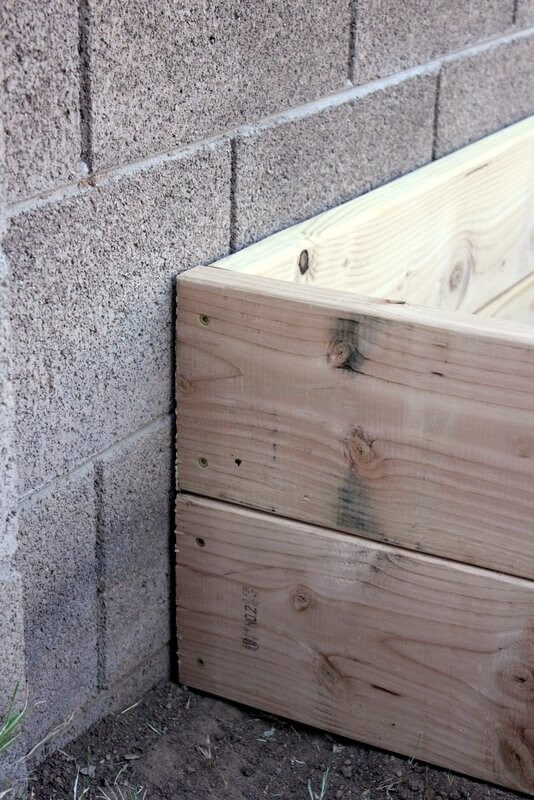
Step 2 – Find some level ground and start screwing those boards together!
Yes, it’s really as simple as this. Just butt one board up against another and start screwing! Because we used boards of wood that were 2 inch of thickness, we used 2 1/2 inch screws. We also made sure to use wood screws with a star bit, so it would be much easier to screw than the standard Phillips.
? Here's how you can build them yourself!")
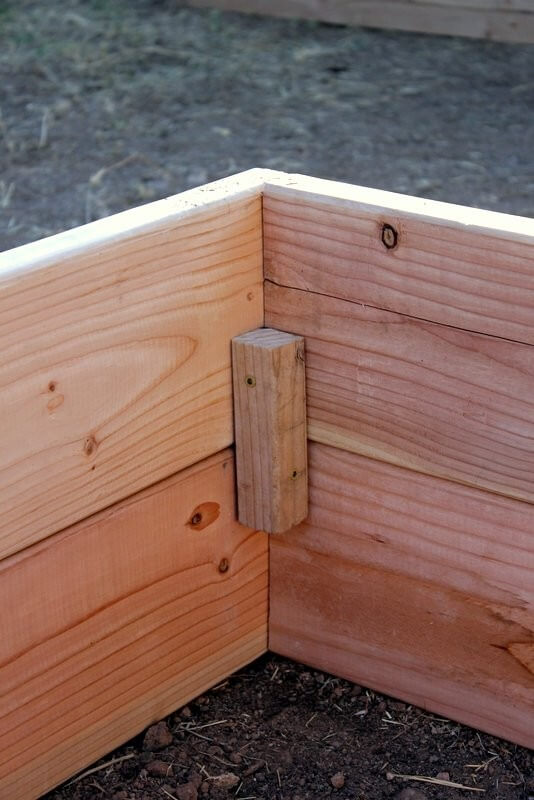
Step 3 – Determine what you want to use for your corner braces.
Although a lot of people use metal brackets, we went with just a simple 2×2 block of wood. This way, we could not only secure the corners together, but also secure the two levels together. Also, it cut down on the costs:)


The costs of raised garden boxes
Wood – (22) 8x8x2 douglas fir wood planks, (4) 10X8X2 douglas fir wood planks = $200
Screws – $30
Total Cost = $230 for 126 sq feet of gardening space! Not too shabby!
After you’re done, the only thing left is to fill your raised garden boxes with soil and start planting! See? Easy! In my last part of this series, I’m going to share with you the specific type of soil I used to fill my raised garden boxes with!
? Here's how you can build them yourself!")

Hi,
Nice instructions on “Cheap and Quick” garden boxes. If moles or gophers are a problem, you may want to add cheap wire mesh to the bottom of the garden boxes. You can either staple gun the mesh to the bottom of the wood frame or hammer in, then bend, nails into hooks to hold the mesh. Also, you can then line the bottom with breathable but weed-stopping garden fabric.
Hi, I’m doing raised garden beds. I am a beginner i dont want to use my native soil. Can i use potting mix and just the ammendments you recommend?
Hi Shamika-
Yes, you can use potting soil and then add in all the other recommended items. Thank you -Bobbi (DaNelle’s Assistant)
Love the Douglas Fir wood, is possible to naturally stain it a bit darker? If so what would you recommend?
Hi Cat-
The safest option would be to treat the wood with Linseed oil instead of staining it. The oil will darken the wood to a nice honey color. I hope that helps! Thank you -Bobbi (DaNelle’s Assistant)
I know this post is almost 4 years old but I wondered if you were successful in keeping the Bermuda grass at bay? Every time I start a box here in my Mesa yard it gets overtaken by the grass!!!!
Hi Shannon-
Yes, DaNelle was successful in keeping the Bermuda grass under control. What she does is lay 12 inches of wood chips on top of it. I hope that helps! Thank you -Bobbi (DaNelle’s Assistant)
Wow. Finally. Easy instructions. Have to really try this. Thank You.
Love your simplified engineering skills and your honesty about them!!! This might be a dumb question, but if I were to make a raised box, do we put wood at the bottom. I plan on putting them on my porch outside but it looked like yours is raised with it open to the ground? Do we leave the bottom open if putting it on cement as well?
Thanks for your help!
Thanks, Monique! No, we don’t put wood at the bottom. You want the soil in the raised garden boxes connected to the ground. If you are putting it on cement, then yes, do a wood bottom:)
Great ideas
I’m not handy with tools so I made my raised garden with cinder blocks. Which was really cheap, 12 blocks $14. In the holes in the blocks I planted magnolias. This was the best garden ever, my bell peppers produced 400% more than my regular garden. 10 peppers last year, I’m at 50 and counting. Building 2 more next spring.
Can you post a pic of the cinder box garden and the magnolias?
I’ve been thinking of cinder blocks for raised beds for a while. Those cavities seem to come in very handy… Marigolds like you did, chives, a garlic, pansies… the opportunities seem endless 🙂
We live in Central Florida, so we have sandy soil. What type of soil should we purchase?
How did you attach your wood corner braces? I only see screw holes where the boards are attached to each other.
We screwed a piece of wood connecting the two. You can see that in the picture:)
I always forget you’re in Arizona, until I see you mention it on a post in my Facebook feed.
Thank you so much for this post. I’ve been considering raised beds but deciding on the wood had me stumped. I had a friend from Seattle tell me she used a particular kind of wood, but with the Arizona heat and monsoons, I figured the contracting and expanding of the wood should be a consideration, and I didn’t think it would hold up.
We also have flood irrigation. Do you have any of your beds where your irrigation floods?
I also had some people tell me I shouldn’t used raised beds here because they dry out so much faster than in-ground beds – which makes sense. What has been your experience?
Thanks!
Hi MJ,
We build a pad of dirt up so our flood irrigation doesn’t touch the garden. I’m not sure about the faster drainage, though that’s something I’m happy about since Arizona’s clay soil doesn’t drain well:)
We keep our raised boxes built on a pad out of our flood irrigation, and we used a mulched soil to help prevent over drainage. This is our first year though, so I’ll definitely let you know how it goes!